By now many of you have received your finishing kits for the Summer Freebie…Thank you so much for doing so…we love that we can give you all the blocks free during the summer
event and we appreciate that you like our finished quilt enough to purchase our finishing kit and again support my business. Again… THANK YOU!
I thought I would share with you how simple it was to do this curved inner border. I am not giving you specific directions in hope that you will have purchased or will now consider purchasing the finishing kit after you see how easy it was done.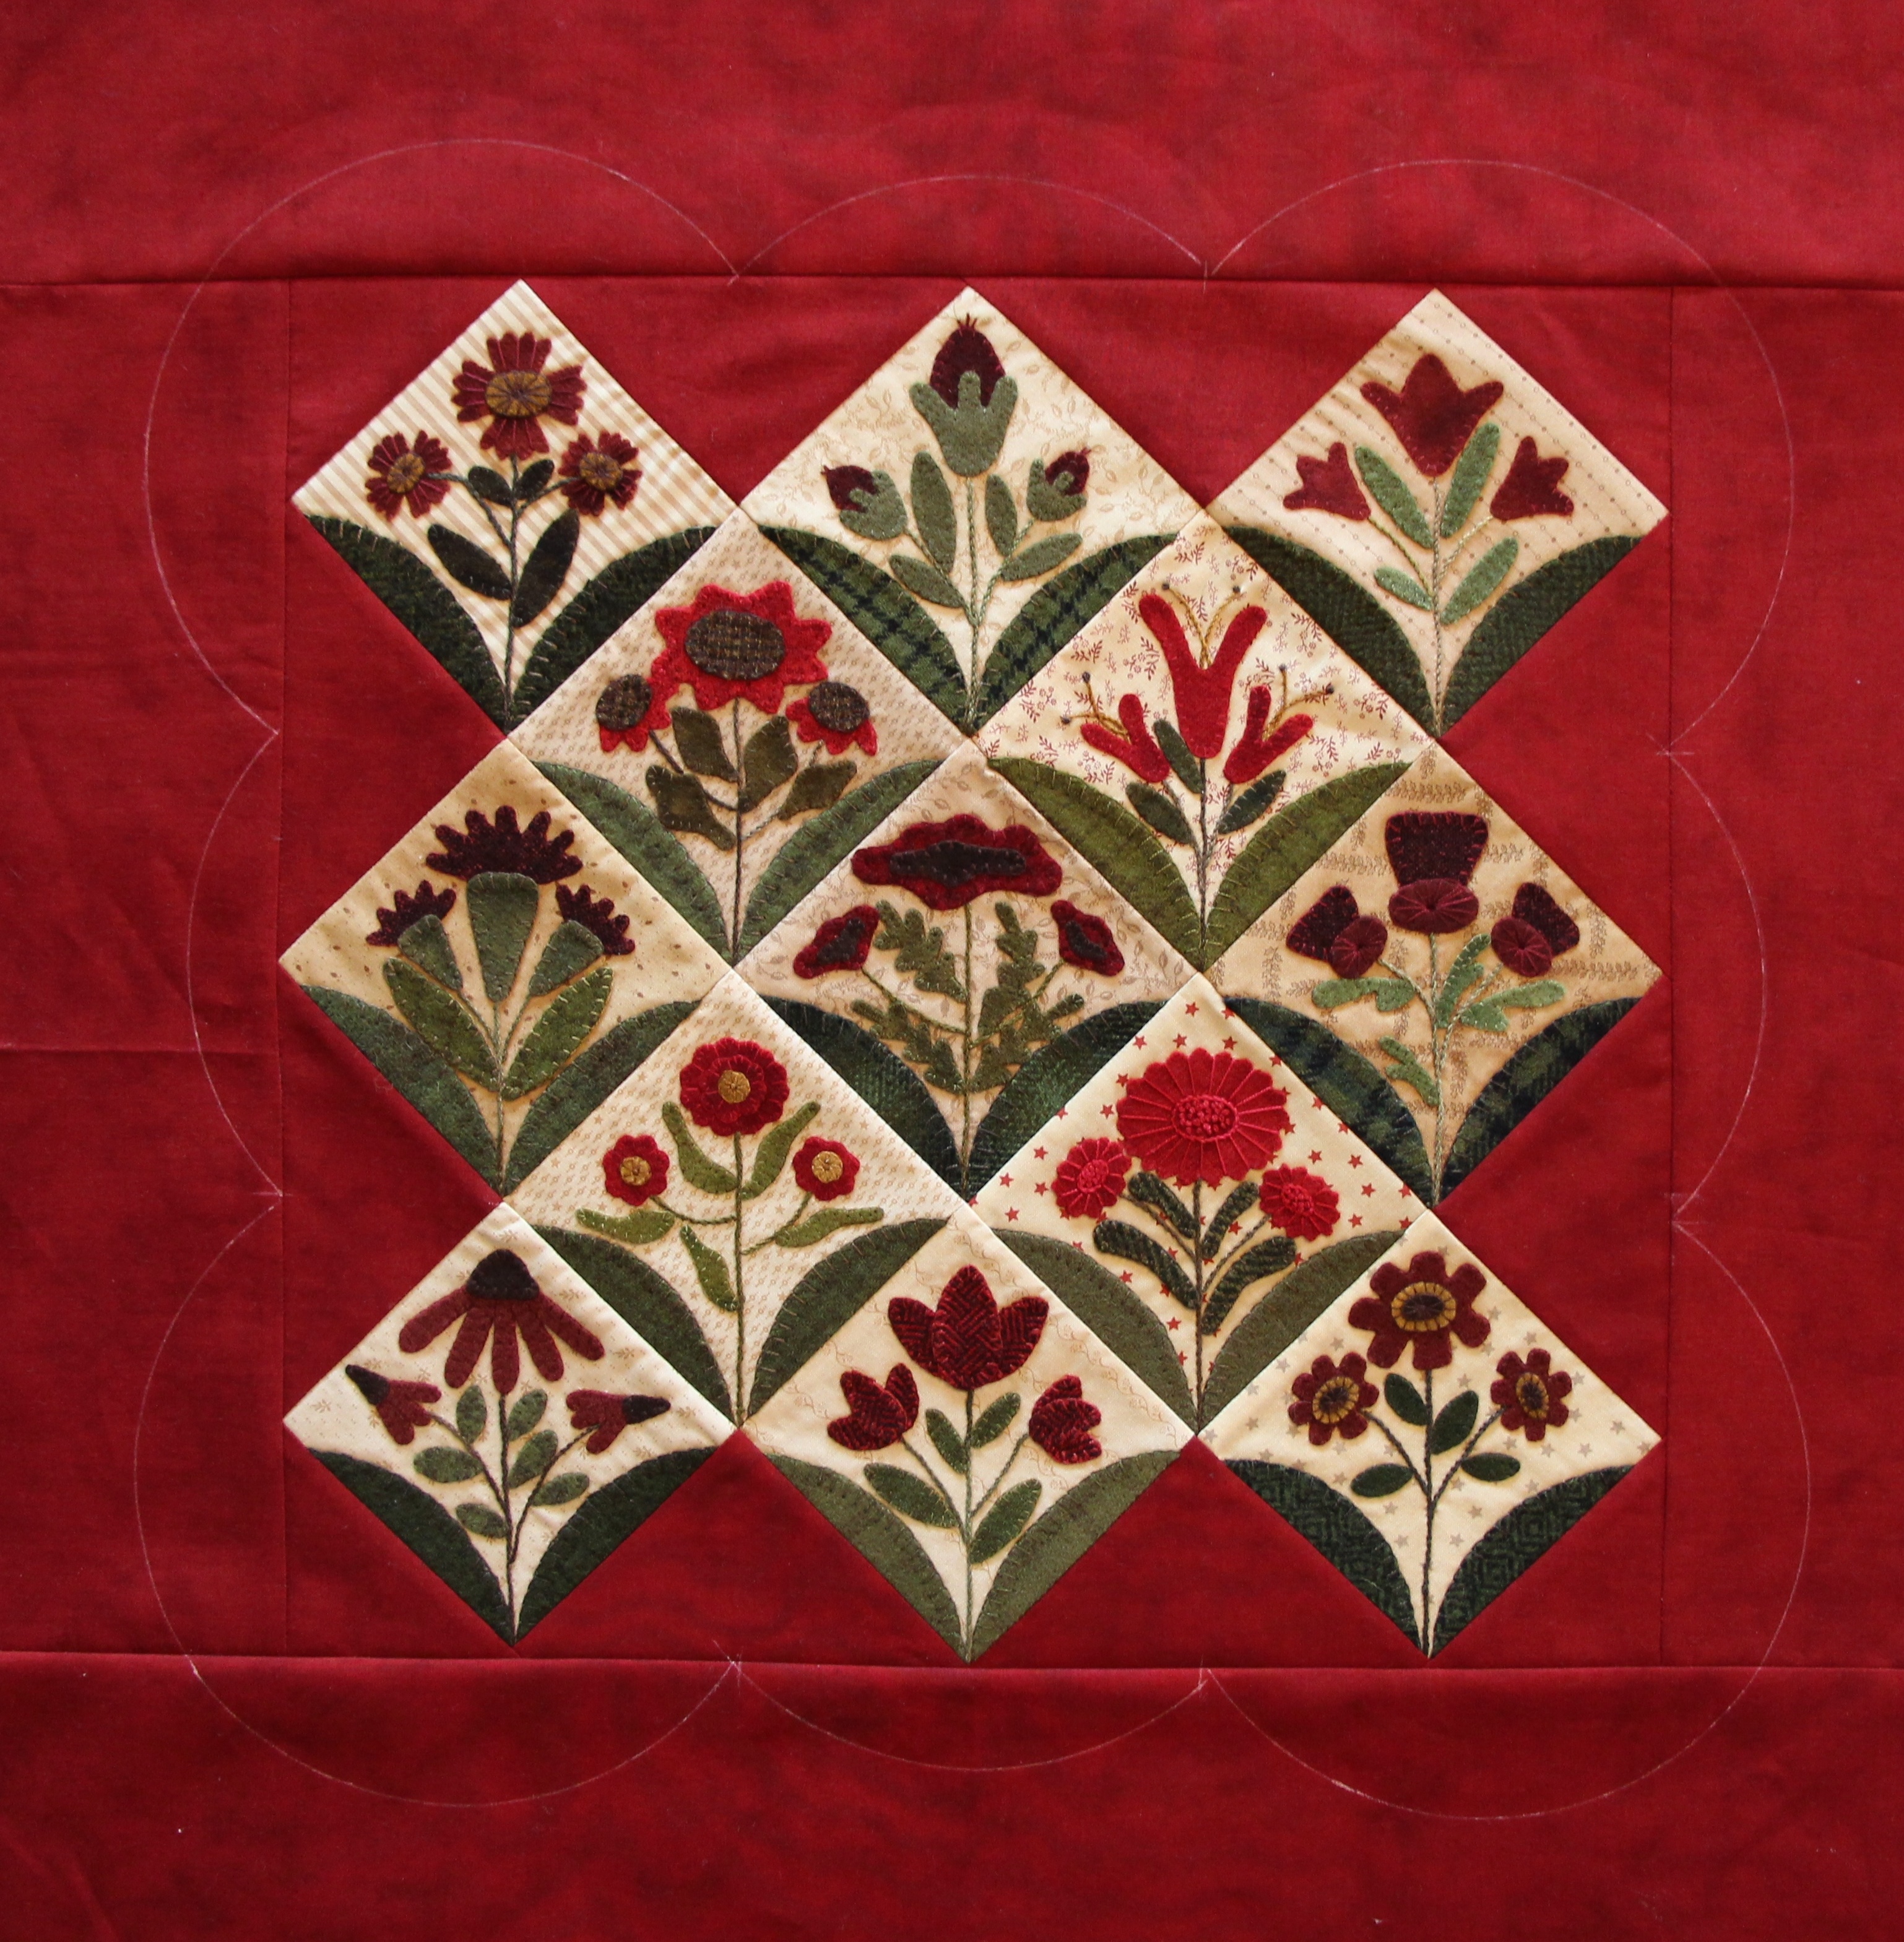
In the first photo I have stitched the setting triangles and the blocks together into rows, stitched the rows together and then added the borders…as you can see my borders did not have to be this big…but I have never done this before so I didn’t know…The finishing direction will tell you what size to cut your border to…I used a small plate to draw my curves….I have given you the curve in the pattern so no need to audition your plates like I had to do…Trace the curve with your Clover liquid chalk pen.
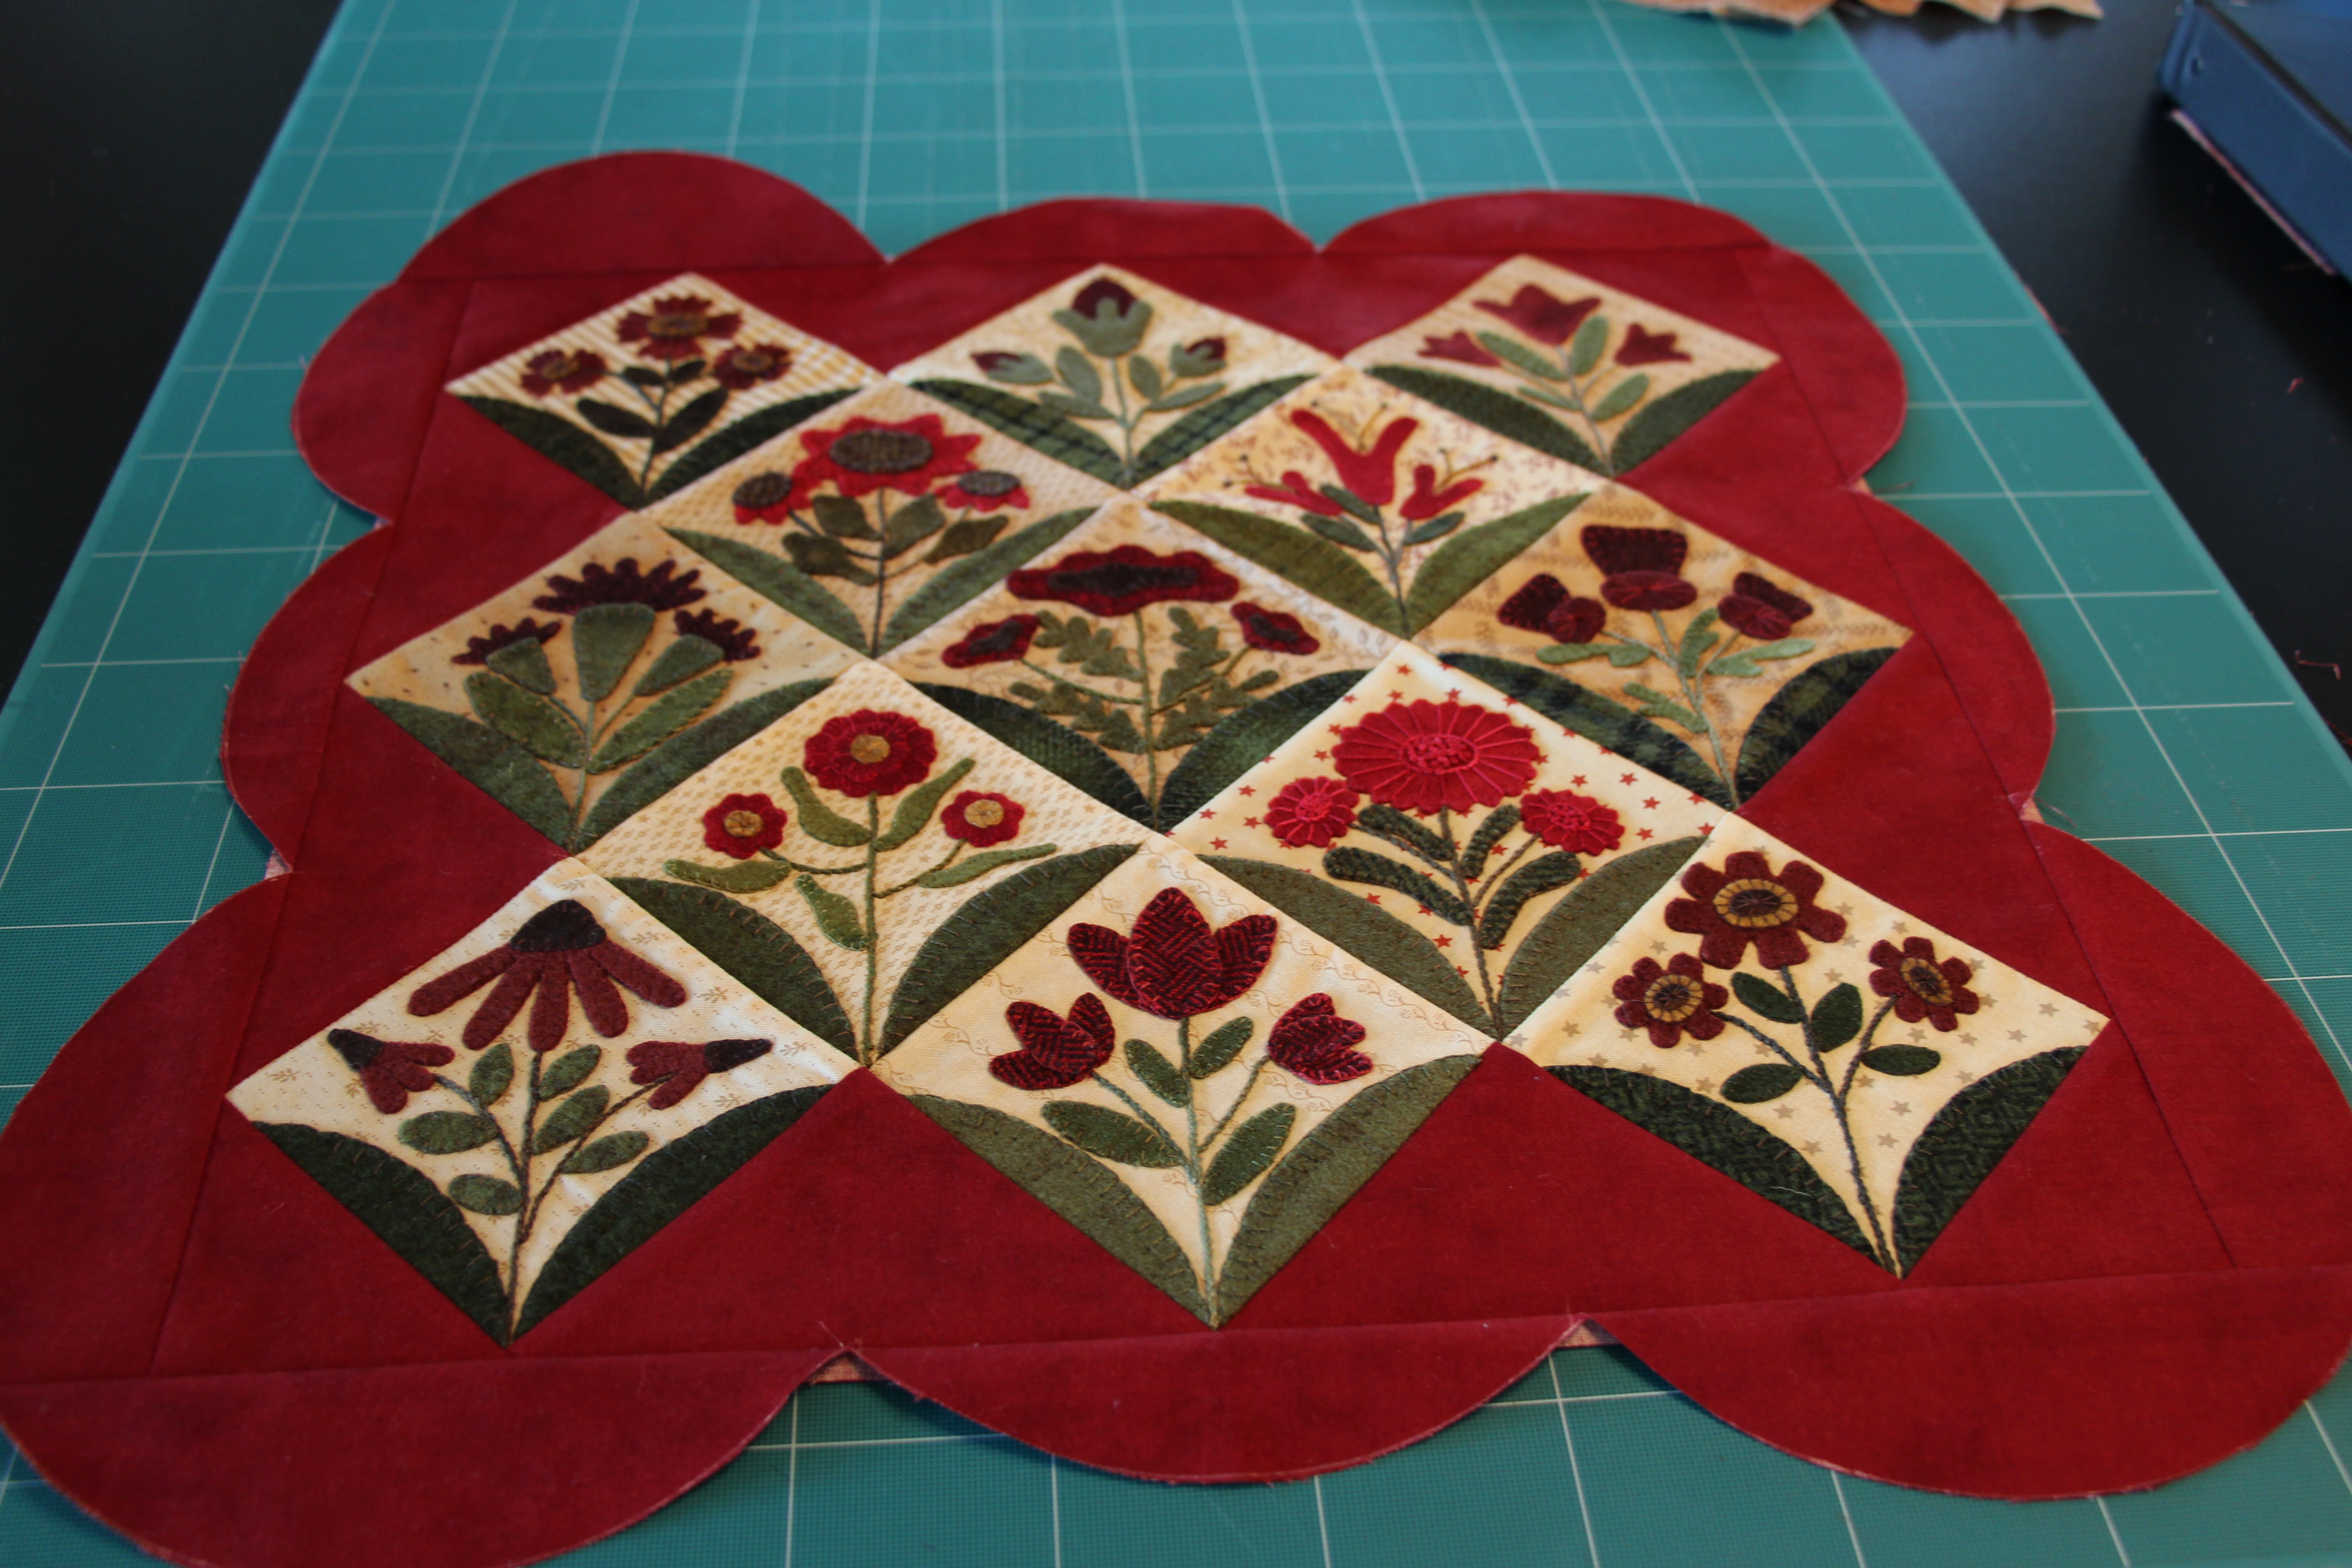
In the second photo I have cut away the excess border not needed. I trimmed it right on the line…
In the third photo I placed the top onto a tan print square, folded the top back and added little dots of Roxanne’s Glue on the edges. Then secured it flat onto the tan fabric. Then the last picture shows the vine placed on the edge of the two fabrics along with some new appliquéd flowers and some from the blocks. 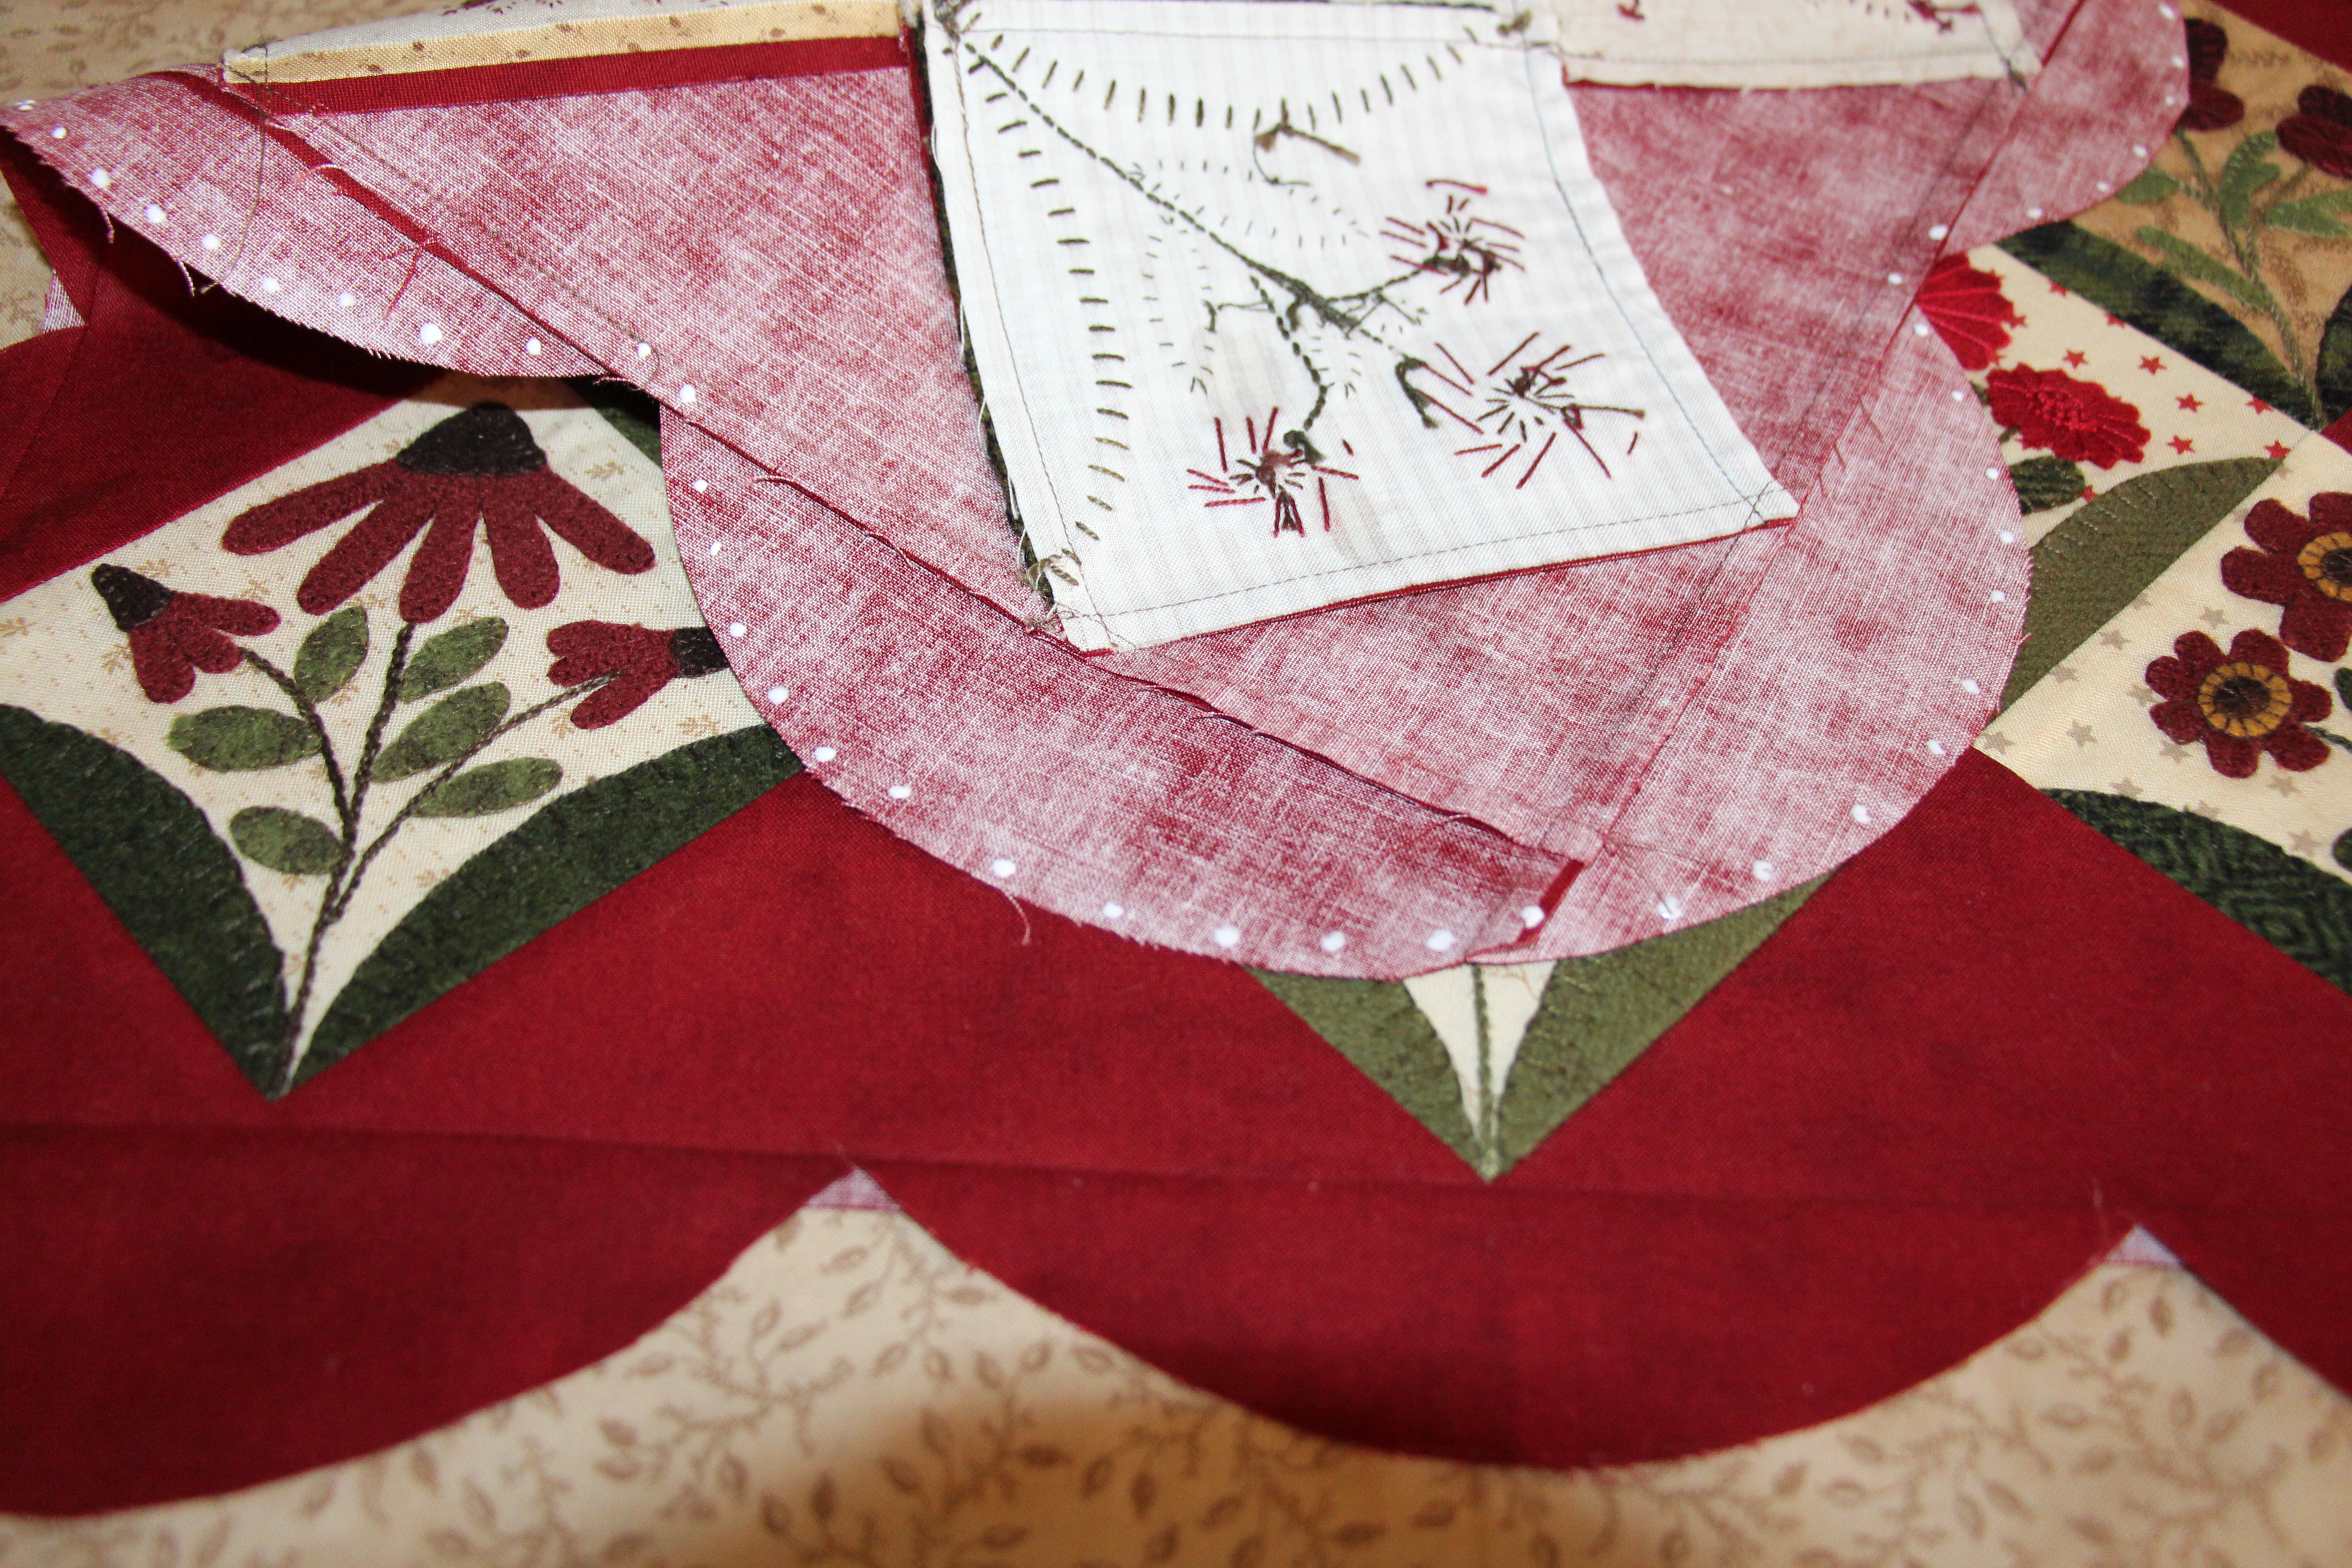 If you have changed your mind and now would like to order a finishing kit for your freebie blocks you can do so HERE We will only take orders this week yet to ensure you get a kit. Also this is your last reminder to order a finishing kit for the Words to Live by…quilt. You can purchase that HERE Hope you enjoyed this little peek at how this was stitched.
Tomorrow I will talk about the Pieced block of the week…LB


Leave a Reply